PhotobucketPhotobucketPhotobucketPhotobucketPhotobucket
Showing posts with label photography. Show all posts

Tuesday, July 8, 2014

7 ways to create beautiful depth of field in your photos

Wanna make photos like the one below? Then I have 7 great tips for you. These are things I learned during photography and from other articles like this. Depth of field is the the area that is in focus in your photo. So Wen you have a shallow depth of field only your subject is in focus, when your depth of field is very big, everything is in focus. Not all of the tips work with phone camera's, but hey there is a reason people buy fancy cameras. So lets get started!
1. Aperture
The aperture controls the amount of light that can come through your lens, it consists of blades that can narrow the 'hole' in your lens. You can see it in the pictures above. The size of the hole is indicated by the f-number, the smaller the number the bigger the hole (this might be a little confusing at the beginning). So f/4,5 is bigger than f/29. The size of your aperture influences the depth of field. You can see this in the photos on the right. So if you want everything blurry except for your subject, choose a low f-number.

All DSLR's have an option to set the size of the aperture, mostly its called aperture priority mode or just A. Some compact camera's have this option too, Phones however never have this function because they have a fixed aperture.
2. get close to the subject
The closer you get to your subject the blurrier the background will become.

3. create a bigger distance between your subject and the background
This will make the background less in focus and therefor less sharp.
4. zoom in
When you zoom in on your subject the effect will be similar to getting your camera closer. This only works with optical zoom (when your lens gets larger) and not for digital zoom (the thing phone camera's do when they zoom in). Digital zoom is just cropping your photo and doesn't change anything about the depth of field.
5. get a camera with a bigger sensor
The size of your sensor has huge impact on your photo quality, and also on the depth of field. The bigger the better. Phone cameras have really small sensors, compact camera's a little bigger onces and DSLR's have quite big onces. In the picture you can see the different in sizes of phone and slr camera sensors.
6. Editing
You can also blur your background with some photo editing. You can do it with photoshop, instagram, picmonkey and numerous other apps and programs. But as you can see in the photo above is the blur different. Personally I think real blur to be much prettier. With real blur I mean blur that is created by using one of the other options in this article.
7 free lensing
Free lensing is an awesome technique you can try with cameras that have interchangeable lenses. I wrote a post about how it works a while ago. Free lensing can make the depth of field very narrow. It has the same result as a tilt and shift lens but those are quite expensive.

I hoped this helped you guys! If you know an other technique on getting a shallow depth of field please share it in the comments, I'd love to learn more!

Saturday, June 28, 2014

How to get started with analog photography


Okay, why would you want to shoot film when there are digital camera's out there? I'll tell you, it's much more fun! I love the look of those vintage camera's and the look of the photo's. And the surprise element of it is also fun. You don't know what the photos you took look like until they're developed. But were to start, and how does all this stuff work? I'll share some tips here for you guys.
Well the first thing you'll need is a camera. There are so many different types of camera's. They all look different and 90% of them looks awesome, but there is also a big percentage of camera's that are broken. Here are some tips on how to get one that suits you for an affordable price. 

-Where to get a pretty vintage camera- 
They don't sell these things in the supermarket so where to get them? Flea markets are great, but you have got to be a little patient, finding one can take some time.  Something you should try is asking your friends and family if they have an old camera somewhere in there house. They probably didn't use it for years and are happy someone els can have fun with it and give it to you for free. Most old cameras aren't worth much. Personally I would never buy a camera for more than 20 euros unless it's really special. I advice not to buy them online, because these camera's are mostly a bit overpriced and you can't check if they are not broken.
-what kind of camera do you want?-
All that a camera has to do is project the light of the scene you want to photograph on the film. Some camera's can't do much more than that but others have a lot of options and buttons. Don't be afraid when you see a camera with a lot of buttons. When you're a beginner in photography and don't know yet how to use shutter speed and aperture to get good photo's you probably want a camera with a automatic exposure function or one that has a build in light meter. When your camera hasn't got a build in light meter this might come in handy. SLR camera's are really nice to work with because you can see though the lens, this enables you to focus more precisely. When you can't look trough the lens focusing is just guessing. There are also simpler camera's with a fixed focus, like Polaroids, which means you can't focus, but mostly you get pretty sharp images anyway. So ideal for beginners is a SLR camera with a auto exposure mode. I wouldn't advice a Polaroid or other instant cameras because the film for them is so expensive, although they are much fun.
-What kind of film do you need?-
So you have an awesome camera, now you'll need some film for in it. There are a few things to pay attention to:
Size: Film can come in quite some sizes, the most camera's use 35mm film. That are the ordinary film cannisters. This is the type of film you can still buy in some shops. In almost all 35mm film canisters there is room for 36 photos. Then there are bigger 120mm film rolls or medium format film. There are also a lot of camera's that use this type of film. Mostly there fit about 12 photos on each roll. There are more types of film but I have no experience with them and they are much more rare than these two sizes. When you are a beginner or can't develop your own film I advice to stick with the 35mm film and with a 35mm film camera. The type of film a camera shoots is also an important thing to pay attention to when selecting a camera. There are places where they do sell and develop other film sizes but they are harder to find. 
ISO: Besides different sizes of film there are more things to pay attention to when selecting film. One thing is the ISO number of the film, the higher the number the more sensitive it is to light. When shooting outside in daylight ISO 100 is just fine. But when you want to shoot inside a lot you might like ISO 400 film. In most cases an ISO between 100 and 400 works fine. Mostly you can turn a wheel on your camera to set the ISO number of the film you're using so that the camera knows how to expose the photos.
Type: Then there are different types of film. There is black and withe, color and slide film. Slide film doesn't produce negatives like the other kinds of film but shows the scene in correct colors. This type of film is meant to view in slide shows, you can scan the images with a scanner to have them digital and print them. But color negative film is most ordinary to use.
TIP: when the film package says 'develop before 1996' you can still use it. That date indicates the time that they can guarantee that the colors and stuff will come out normally. But a bit weird colors are fun so it's only more awesome.
-How to use a vintage camera-
 So you have got that camera, and some film. Now lets take some photos! err, how? The first step is putting the film in the camera, youtube is your friend on this one. Search for 'how to load film in a ... camera' with your camera type in the place of the dots. 
And you might find a video where someone explains it. A user manual can be very handy too, if it didn't come with your camera try googeling for it. Something that helps understanding your camera too is chating with the former owner, he/she probably knows a lot about the camera. So when buying one, don't hesitate to ask a few questions about the camera. 
     When you have shot your photos you'll need to get your film developed. There are still some places that do this for you. Places with photo printing cervices like some department stores often offer this service. There are also some websites that offer this and than you'll have to send your film to them, I never tried this myself. An other alternative is experimenting with developing film yourself. But I wouldn't try that until you are completely comfortable with analog photography.
Tip: don't shoot important memory's the first time you try out a camera, if something goes wrong and your photos are ruined you'll lose these important photos, and that would be pretty sad. 
Wow that became a little longer story than I intended, what can I say I just love talking about camera's. If you have any questions or if something isn't completely clear just ask me! remember google is your friend when it comes to learning something new like this.

Thursday, May 15, 2014

free lensing


 I am in the middle of my final exams, so taking some photos in the garden is a welcome
distraction. I just bought a new camera last week, it's a Nikon d5200, I wanted a new one because my last camera couldn't take movies. And I love it. for most of these pics I used the free lensing technique.
With free lensing you don't attach your lens to the camera, but you hold it in front of it. And when you tilt it a bit you get this great blur in some parts of the picture. It takes some practice and isn't easy at all, but the results are quite good.
Now I'm off to bed. Sleep tight everyone

Saturday, May 3, 2014

some analogue pics

I finaly scanned the photo's I made with my zenit-E last summer, and I love them. And my uncle gave me his pentax camera, so all I was thinking about yesterday was analogue photography. I just love how the first photo always has this white piece. And don't you think my guy looks great in that pic. I love that it always is a surprise what your photo's will look like when shooting film. If you have a old camera laying around in your house, you should try using it once, it is awesome believe me.

Saturday, April 19, 2014

Happy easter, a tutorial

 Happy easter everyone. I hope you have a lovely weekend with your family. I made this coming-out-of-an-easter-egg photo as easter greeting this year. I was inspired by the awesome works from Joel Robison you should check out his work, its amazing. He made a tutorial on how he creates his masterpieces. This is a Picmonkey tutorial, and if you use this link you will get a free day of premium.
*Click like to see more for the tutorial*

Tuesday, March 18, 2014

photo manipulations

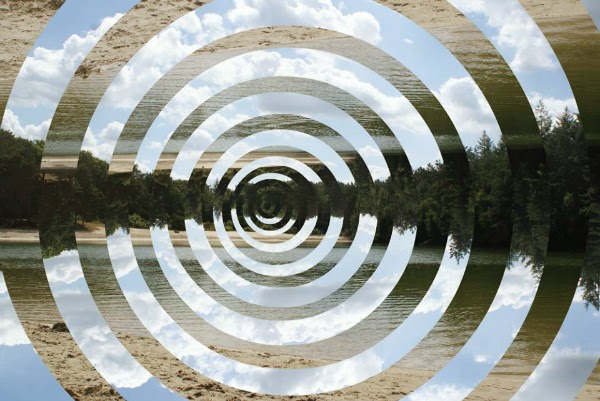
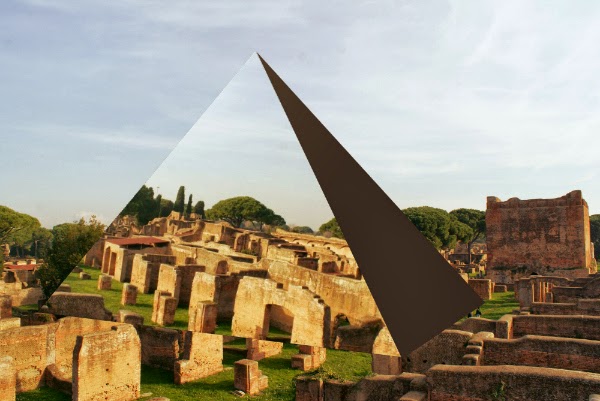
As you might know I really like manipulated photos. I'd say photoshopped, but I don't really agree with that term since you can edit photos in other programs (that do not cost 600 euros) too. Anyway I thought I'd show you some of my own works that I have not shown you before. These are all made in Picmonkey, and sometimes I used Microsoft paint too. Yay for free programs. I'll make a short note at every picture about how I created them.
-for this one I opened one photo in picmonkey and than added the same photo as an overlay. I fliped it and then I used the circular paint/eraser brush to make this pattern. It's kind of trippy, I like it.
This is a photo collage, also made using the overlay option. I used 6 photos on this one. It kind of reminds me of surrealistic art.
This is my lovely boyfriend Tim, don't worry he wasn't falling for real. If you'd like to learn how to achieve this effect take a look at my tutorial on levitation photography.
I copied this concept from a photo I am unable to find. So I'm really sorry I can't give credit for the idea. I used Microsoft paint to make the triangle shapes, then uploaded those in picmonkey as overlays and adjusted them a bit. 
for this one I used the tint option in picmonkey to add the color. I really like the rainbow stuff in this one. 
Once again I used paint for the triangle shapes, and uploaded them to picmonkey as an overlay. 

So I hope you guys like my stuff, in case you do you might like to follow my photography board on pinterest.

Saturday, March 15, 2014

make your own galaxy photo with picmonkey

hey ho, I'm here today to learn you how to make your own super fancy galaxy photo. It is not that hard, and it uses picmonkey, which is free, so you don't have any reasons left not to spice up your holiday snapshots with some stars. (using this link, gives you a free day picmonkey royal)
(click like to see more for the tutorial)

Tuesday, October 29, 2013

bye bye

 Well I haven't been updating a lot lately, and I just wanted to say I'm not dead so don't you worry. I'm just pretty busy. I'm not saying I am going to stop posting at all, but I am not going to post as frequently as I used to. You can follow me on instagram if you'd like to keep seeing some of my stuff some times. these photos are from my instagram. Well I'll say goodbye for now.

Wednesday, August 28, 2013

analog photos

I had my film developed a little while ago, and today I'm sharing some of the pic's I made with you. I used my zenit-E to make the photos. there where none failed pictures, that made me happy in the first place. I really like this camera, I got it from a friend. the SLR camera has been made in the USSR a long long time ago (about 40 years). The thing that I love about it is that it works without a battery, but it does has a light meter. when you want to take a picture, you first have to focus, that check the light meter than adjust your aperature and shutter speed, than pull the leaver for a new piece of film and then finally you can make the picture. A lot more work than with a digital camera but I think it's fun. (I can talk about camera's all day but I'll stop for now)
 this is the guy that made these pic's possible

Friday, June 14, 2013

lately

though it isn't as warm as it was when I took these photos, it is still summer like with all little flowers and sunbeams. And I really like summer. Wonderful gracious summer. My life has been so so busy lately, I have had an exam week and Wednesday the re-exams will start. but after that its over, it will be all over, and the the glorious summer vacation will come like a messiah into my life and set me free from all the obligations. I am so longing for that time.

Saturday, June 1, 2013

double exposures


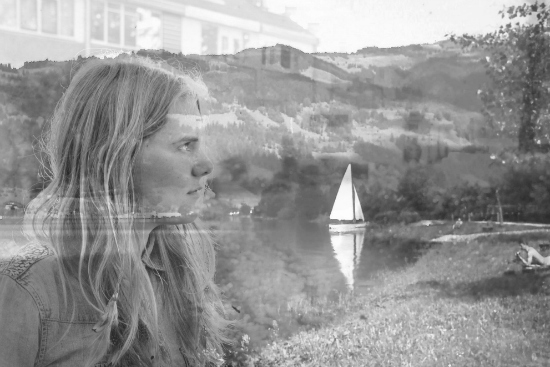
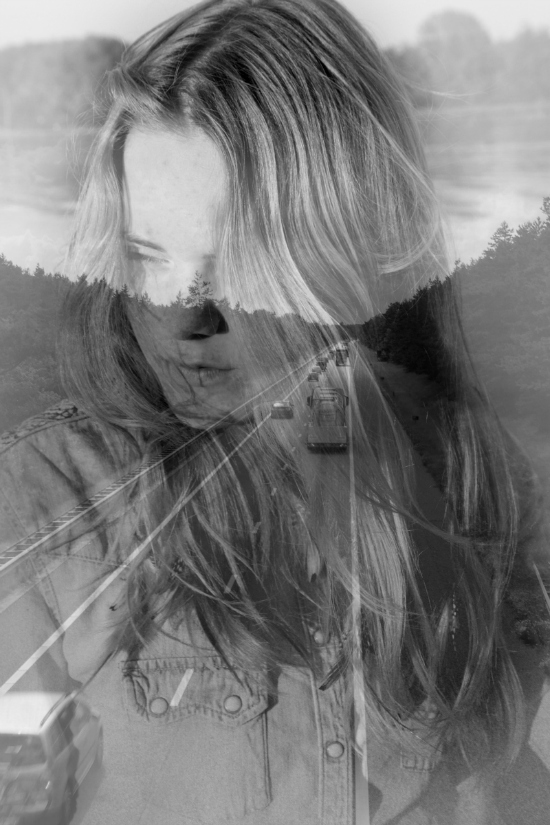
I love double exposure photos. I'd really love to try this with film once, but for now digital editing is good enough. These photos are from a little photo shoot with Tim, and the overlays from several different occations, the first overlay is a scanned dia from my grand-aunt, the second is from a trip with Tim last summer, the third is just a little flower in the grass, the forth is from my trip with Tim to Brussels, and the fifth is our wood storage in the garden.
I had been experimenting with buildings as overlay this afternoon. And I made them all black and white. I have made some before, but those where in color and had several overlays, instant of one. If you like this, take a look at the tutorial I wrote about double exposure (for picmonkey). It is not that hard and it has great results.

Tuesday, May 7, 2013

polaroids


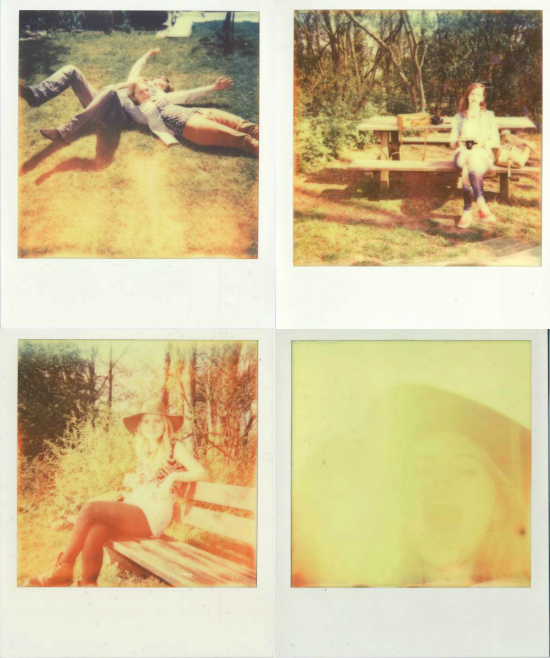
 I know it's been a while. But today I'm showing you something I'm exited about. because last week I shot my Polaroid photos. finally 2 years after buying my camera. I remember buying it for only 2 euros at a Finnish flea market. I couldn't believe the price. and a little more than a year later my friends gave my a film pack for my birth day, these things are 25 euros for 8 photos, damn... That's why I waited so long to use them. I was afraid to waste them.
The battery is included in the package, and the battery that was in the package that came with the camera was empty, so I think its formal owner thought the camera was broken but the battery just ran out. In that package was still one overexposed failed photo that I used for a little project.
when they come out of the camera, the photos are blue, like completely blue. And you have to hide them away from light for a few minutes. Then they develop and lose their blueness. And you have your Polaroid pic. I love the colors, light leaks, spots and these edges, the upside one is blue at most photos. I even like them being a bit unsharp, because you can't focus with a Polaroid camera, you can only slide a close-up lens in front of the lens.
I really like talking about vintage cameras, but I'll leave it at this for today. If you have any questions feel free to ask.
ps. this is so much cooler than the effects on instagram. It's the real deal