1. supplies
you'll need some photos, one basic photo and some for overlays.
2. editing
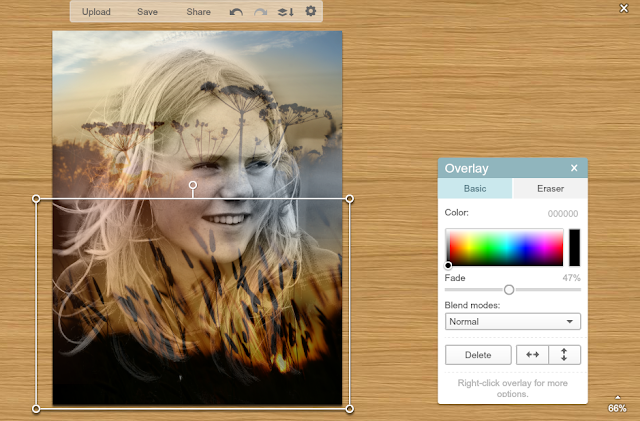
1. open your base photo in picmonkey
2. go to the overlay section, and choose 'your own'
3. select a photo and make it the good size
4. Erase the edges, so you won't get harsh edges over your photo.
to get smooth melting edges go to the eraser section and put the hardness on zero and the eraser size on the max. than carefully eraser the edges. if you accidentally erased to much than press the brush button and fill up the gap you made.
5. go back to the basic section of your overlay and fade it, I did mine about 50 %.
6. add more!
add as much overlays as you like
7. Save. if you're satisfied with the end product save it.
I hope its clear. If you have some questions feel free to ask in a comment below.
I'd really like to see what you have made. let your creativity go wild.
I made my own constellation using this technique:
.


Finally a photo tutorial that use picmonkey! I am so happy now :O) I am totally going to try this! Thank you so so much!
ReplyDelete~ Emma-lee
Ga het gelijk proberen, link je zometeen wat het werd (verwacht maar niet te veel haha! ) :D
ReplyDeletecool ik gaa het ook is een keer proberen
ReplyDeletexxx,
yours
Ahhhhhh!!!! I love you so much for this! I used to use photoshop to do the multiple exposures but that was too over my head. haha. This is way easier!
ReplyDeleteIt's not like I literally just added 10 exposures to one of my pictures or anything;)...
Hi ! Thank you really for this tutorial !
ReplyDeleteThanks so much!
ReplyDelete